Showing posts with label Desserts. Show all posts

Tuesday, October 18, 2011

Peanut Butter Eclair Cake

Don't you just want to stick your finger in this and lick it?!?  Nothing goes better with peanut butter than chocolate. (sorry jelly)  This super duper easy dessert is so rich that you might have to eat it in 2 sittings.  I kept getting request for this recipe so I thought I would share it with you. I hope you enjoy it!

Ingredients:


1 bxchocolate graham crackers
2 bx(3 1/4 oz boxes) vanilla instant pudding
1 cpeanut butter
3 1/2 cmilk
1(8-ounce) container cool whip, thawed
1 can(s)of your favorite chocolate frosting
*TIP: IF YOU CAN NOT FIND THE CHOCOLATE GRAHAM CRACKERS THEN YOU CAN USE CHOCOLATE TEDDY GRAHAMS.
*TIP: IF YOU LIKE A CREAMIER TEXTURE YOU CAN MAKE YOUR OWN WHIPPED CREAM AND MIX IT WITH THE PEANUTBUTTER MIXTURE INSTEAD OF USING THE COOL WHIP.

Directions:
1) Spray the bottom of a 9x13 pan with cooking spray. Line the bottom of the pan with whole graham crackers.


2) In a large bowl, use an electric mixer to mix pudding with milk and peanut butter; beat at medium speed for two minutes.


3) Fold in whipped topping


4) Pour half the pudding mixture over the graham crackers. Place another layer of whole graham crackers on top of pudding layer. Pour over remaining half of pudding mixture and cover with another layer of graham crackers.


5) Heat the container of prepared frosting, uncovered in the microwave for about 1 minute. Pour over the top of the cake. Refrigerate and let it set up for at least 12 hours before serving.

Thursday, September 1, 2011

Koolaid Rice Krispy Treats

Sorry I haven't posted in a while, to say I've been busy lately is an understatement. Jada started kindergarten and I started a part time job in the evenings and my life has been a whirlwind ever since. Well I came across these yummy little treats recently and have made them them in several flavors. The picture above is watermelon cherry flavored.  It's a nice twist on your standard rice krispy treats. They are sweet and tart and full of flavor!

INGREDIENTS

1 Stick of butter
1 Package of mini marshmallows
8 cups of rice krispies
1 package of any flavored koolaid  (you can use 2 packs if you like more flavor)
cooking spray


DIRECTIONS

1) Prepare your baking pan, spray bottom and side with spray.... set aside.

2) In large non stick pot melt butter at med- low heat. Add marshmallows and kool-aid stirring constantly until melted and mixed well, be careful not to scorch. Remove from heat.

3) Pour rice krispies over marshmallow and kool aid mixture. Mix thoroughly...spoon into baking pan and press down with wax paper till firm....let cool then cut into squares and serve.....


Thursday, June 30, 2011

Stars and Stripes Pie


Is this not the cutest darn pie ever? I got the idea from Womansday.com The best part about it is that you really don't have to cook anything. All the ingredients are all ready made so your basically just throwing it in a pie shell. Making the top look pretty and popping it in the oven! So if your trying to figure out what to bring to that 4th of July cook out then here is your answer. Your friends will be impressed I know mine were!
*TIP:  If your not into cherry pies then you can use strawberry pie filling instead like me.

INGEDIENTS:


  • 1 box (15 oz) refrigerated ready-to-use pie crusts


  • 3 cans (21 oz each) cherry pie filling or 3 cans of strawberry pie filling.


  • 1 can (21 oz) blueberry pie filling


  • 1 large egg, slightly beaten in a cup


  • 3 Tbsp sanding or coarse (crystal) sugar


  • You also need: 11/2- to 2-in. star-shaped cookie cutter


  •  *TIP:  I used a shallow pie plate to save money. That way I only used 2 cans of strawberry pie filling and 3/4 can of blueberry pie filling. With the left over dough and pie filling I made fried pies.

    DIRECTIONS:

    1. On lightly floured surface with lightly floured rolling pin, roll 1 pastry round into a 12-in. circle. Fit into a 9-in. pie plate, letting edges overhang. Drain 1 can cherry pie filling, combine in a bowl with remaining 2 cans cherry pie filling.
    NOTE: If your using 2 cans for a shallow pie plate then just use the whole can amount in the pie plate don't worry about draining any fillings.

    2. Make a nice border along the edges of the crust. Brush the edge with the beaten egg and sprinkle the raw or coarse sugar on it.


    3. Bend a clean 6-in. square of cardboard in middle forming a wedge. ( I just cut a plate into a rectangle and bent it.) Place in upper left corner of pie (like hands of a clock pointing to 9 and 12). Fill with blueberry pie filling. Spoon cherry pie filling into rest of pie. Lift out cardboard. ( It is easier to do this step if you have an extra set of helping hands holding the card board in place while you fill the pie.)


    4. Roll other pastry round into a 10-in. circle. With a pastry wheel or sharp knife, cut round in five 1/2-in.-wide strips. With cookie cutter, cut 5 or 6 stars from rest of pastry. Brush strips and stars with beaten egg;sprinkle with sanding sugar.


    5. Heat oven to 425°F. Starting in middle of pie, carefully place 3 long strips, evenly spaced, across filling toward bottom edge. Cut remaining 2 strips into 4-in.-long pieces. Lay over cherry filling on upper right corner.Press ends of strips into edge of crust or lay them flat across like I did in the picture above.


    6. Bake 30 minutes. Reduce heat to 350°F; bake 25 to 30 minutes longer until pastry is golden brown and filling bubbles. Place on wire rack and cool completely.

    Wednesday, February 23, 2011

    White Chocolate Bread Pudding

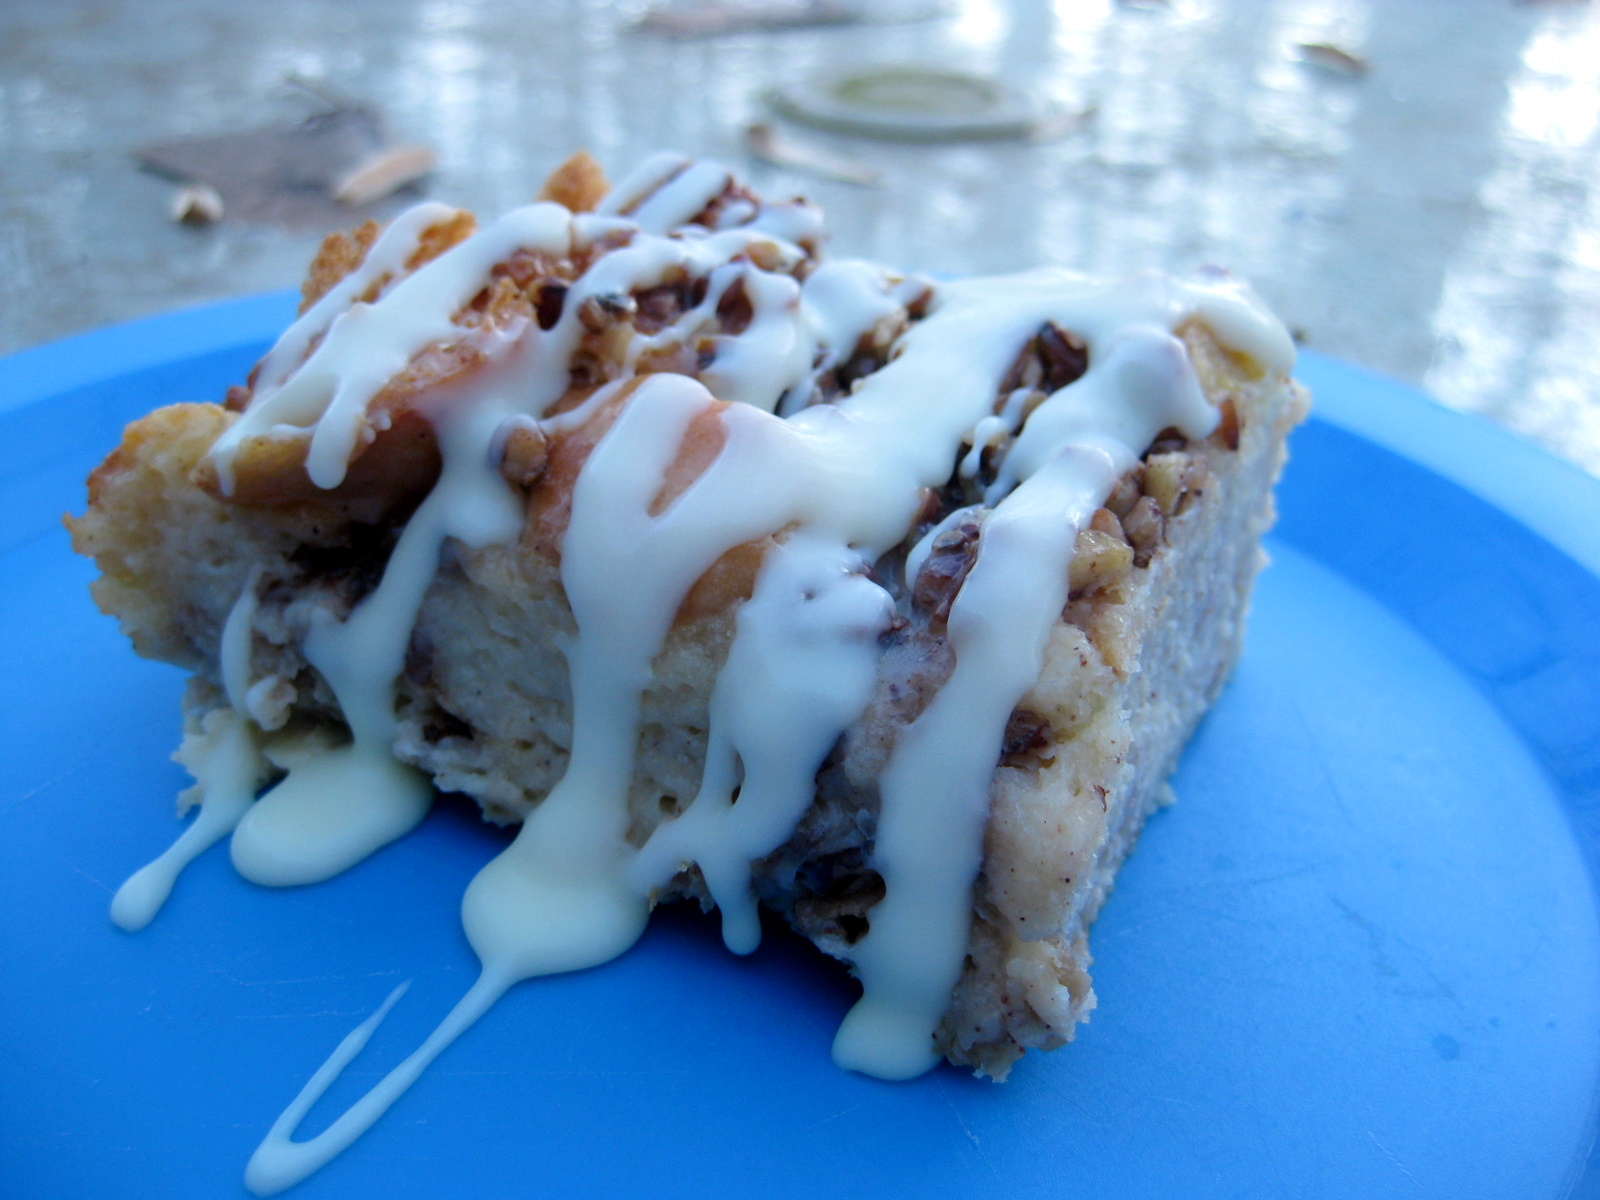
    I have made this a couple of times now. It is super easy and super tasty! I have changed the original recipe up and decided that white chocolate ganache was best to drizzle on the top! It is da bomb!

    INGREDIENTS:

    1 loaf french or italian bread
    4 large eggs, lightly beaten
    2 tsp vanilla
    2 c granulated sugar
    1 stk butter, melted
    4 c half and half, or heavy whipping cream
    1 tsp ground cinnamon
    3/4 - 1 c chopped pecans
    WHITE CHOCOLATE GANACHE:
    8oz white Chocolate
    3oz Whipping Cream
    1 TBL unsalted butter
    DIRECTIONS:


    1) Tear the bread into small pieces into a large bowl. Cover with paper towel or dish towel and allow to sit for 8-12 hours ahead of time (or overnight) to dry out.


    2) For the Bread Pudding, preheat the oven to 350F.
    3) In a medium bowl, mix lightly beaten eggs, sugar, half and half or cream, ground cinnamon and vanilla. Beat slowly until smooth. 
    4) Melt butter in the microwave and beat it slowly into the sugar mixture.Pour this mixture over the bread pieces and stir gently to coat all the bread pieces. 
    5) Pour mixture into a lightly greased 9 x 13 pan and press down gently to get rid of air pockets. 
    6) Bake for 45 minutes at 350F or until lightly golden. Do not over bake.
    7) To make the ganache while the pudding bakes, place the white chocolate chips and butter together in a separate bowl.

    8)  Heat up the whipping cream in the microwave or on the stove. Right before it boils, take off the stove or microwave and pour the heated whipping cream over the white chocolate chips. Stir until all is melted and creamy. Set a side.

    9) When the pudding is done drizzle the chocolate on top. Enjoy!

    Monday, February 14, 2011

    Easy Oozing Chocolate Lava Cake Recipe


    Happy Valentines day Y'all! So the dessert portion of our Valentines foods, of course has to be a Chocolate lava cake. Now don't be scared. This is actually really easy to make, hence the name easy in the title. Now you all know Chocolate is definitely a sexy eat. So here is a little sexy history on yours and mines favorite, CHOCOLATE'!
    Chocolate has enjoyed a reputation as an aphrodisiac since those crazy Conquistadores first laid eyes on the "pagan" ways of the Aztecs (who did regard chocolate as a medicine, but probably not as an aphrodisiac). This reputation positively flourished in the courts of the French kings of the 18th century. The art and literature of the time is thick with erotic imagery in connection with chocolate, partially propelled by the writings of the Marquis de Sade, who mixed the erotic qualities of chocolate with its ability to disguise poisons. Casanova, too, used chocolate (and champagne) as a means of seduction.
    In the court of Louis XV, Madame de Pompadour took her chocolate with ambergris to stimulate her desire for the king -- it was said that she was cold to him. Madame du Barry was the opposite: she was reputed to be nymphomaniacal and encouraged her lovers to drink chocolate in order to keep up with her.
    Today, in our age of science, you will read articles in magazines that claim that chocolate is an aphrodisiac based on studies from reputable universities. Partially true. Scientists have isolated phenylethylamine (PEA); this is a stimulant (found in small amounts in some foods, including chocolate, and also found in the brain) that raises blood pressure and heart rate. A miniscule amount of PEA is released by the brain at moments of emotional euphoria.
    So without further ado, here is the Easy Oozing Chocolate Lava Cake Recipe....mmm mmm mmm ENJOY!

    INGREDIENTS:

    4 individual ramekins
    6 oz Semi-Sweet Baking Chocolate (or use your favorite 70% dark chocolate bar)
    1 stick of butter (8 Tablespoons). (diced, room temperature)
    3 Eggs
    1/2 cup Granulated Sugar
    1/3 cup Flour
    Butter for Ramekins

    DIRECTIONS:

    Preheat oven to 350°F
    1. Melt chocolate in a double boiler. When melted, take off stove top.
    2. Stir in diced butter, until it melts.
    3. In another bowl, beat eggs and sugar, until it starts to whiten.
    4. Stir in melted chocolate and then the flour.
    5. Butter 4 individual ramekins, and pour in chocolate batter.
    6. Cook for about 12-15minutes. Depending on how oozy you want it.
    7. Tip ramekins upside down onto dessert plates and serve.
    Voilà!

    You can definitely prepare your chocolate lave cake recipe ahead of time, and then bake 12 minutes before serving. I always do it this way!

    In terms of buttering the ramekins: butter the bottoms first, and then butter the sides, wiping from the bottom up to the top. It helps the chocolate to rise even more.

    In terms of baking time… well, it depends on how runny you want it! I like it with a super-liquid-oozing center -- so do my guests! For this, you want the top to be cooked through, but the center to be liquid. You can check with a toothpick after 12 minutes of baking.
    If you don't like liquid-center chocolate desserts, just cook for a little longer, and you will have an incredibly moist chocolate cake. So, either way, you can't go wrong!

    You can serve yours with powdered sugar and whipped cream and any kind of sauce you like. I find it easy to serve it with Smukers strawberry Syrup! Yummo! Serving it plain right out of the oven is great too! How can you not fall in love with this simple and easy dessert?

    Wednesday, February 9, 2011

    Orange Cream Stuffed Strawberries

    In honor of Valentines Day, I thought that I would post some romantic eats for the next couple of days. Anyone can make chocolate covered strawberries, so why not make these yummy little treats for your sweetie instead? Not only do these look fabulous but they taste fabulous too! They get eaten up pretty quick when I make them ! I hope you enjoy this deliciously easy recipe!

    INGREDIENTS:

    1 pt fresh strawberries
    1 (8 ounce) package cream cheese, softened to room temp
    1/2 c confectioners' sugar, or to taste
    1 tsp orange extract
    1 square of melting chocolate
    1/8 tsp vegetable oil
    tip: you can use any flavor of extract you want. you can divide the cream cheese and do half in orange and half in french vanilla too!

    DIRECTIONS:

    1) Cut the tops off of the strawberries and stand upright on the cut side. Make 2 cuts 3/4 of the way down from the tip of the strawberry towards the bottom.


    2)Beat together the cream cheese, sugar, and extract until smooth in a mixer or a food processor. Place into a piping bag with a star tip. Pipe into each strawberry. 
    3) Place the strawberries on wax paper.
    4) Melt Chocolate in microwave, mix well. Add the oil to the chocolate to thin it out a bit. Mix it and put a fork in the bowl of chocolate and drizzle chocolate over the strawberries. You could also melt some white chocolate in a bowl and drizzle both chocolates over the strawberries.
    5)Place on a serving platter and enjoy!

    Monday, February 7, 2011

    Easy Chocolate and Butterscotch Stuffed Croissants

    I made these for breakfast today. The kids and I loved them! These are a really easy and delicious breakfast or dessert. I like to switch it up and put chocolate chips in some and butterscotch chips in others. If you like mint then you can add the Andes chips and make them that way too. The possibilities are endless!

    INGREDIENTS:

    1 Package of ready rolled puff pastry
    1 egg, beaten
    Chocolate chips, butterscotch chips, Andes chips, etc..

    DIRECTIONS:

    1) Preheat the oven to 425 degrees F. Unroll the sheet of pastry and then cut it into 4 squares.Cut each square diagonally to give 2 triangles (they will appear quite small). If using both sheets of puff pastry then you will end up with 16 triangles.Put the triangle with the wider part facing you and the point away from you.

    2) Place the chips inside the triangles about 1/2 inch up from the wide end nearest you.
    Then carefully roll from that chocolate loaded end towards the point of the triangle.
    3) You should now have something resembling a straight croissant, seal it slightly with your fingertips and curl it around into a crescent.
    4) Place the croissants on a lined baking tray and brush with the beaten egg. Bake for 15 minutes until golden and puffy and, miniaturely, croissant-like.
    5) Melt some of the chips in the microwave at 30 sec intervals till all is melted. Add few drops of oil to the melted chocolate and mix. Drizzle melted chocolate on top of the croissants.


    Thursday, January 6, 2011

    The Mardi Gras King Cake!


    This has the texture of a cinnamon roll rather than a cake but it is still great either way! Here is some history of the cake and what it is used for. French settlers brought the custom to Louisiana in the 18th century where it remained associated with the Epiphany until the 19th century when it became a more elaborate Mardi Gras custom. In New Orleans, the first cake of the season is served on January 6. A small ceramic figurine of a baby is hidden inside the cake, by tradition. However now, the tradition is giving way to the baby being supplied and the customer placing the baby were ever they wish in the cake. Whoever finds the baby is allowed to choose a mock court and host the next King Cake party the following week (weekly cake parties were held until Mardi Gras).

    In 1870, the Twelfth Night Revelers held their ball, with a large king cake as the main attraction. Instead of choosing a sacred king to be sacrificed, the Twelfth Night Revelers used the bean in the cake to choose the queen of the ball. This tradition has carried on to this day, although the Twelfth Night Revelers now use a wooden replica of a large king cake. The ladies of the court pull open little drawers in the cake's lower layer which contain the silver and gold beans. Silver means you're on the court; gold is for the queen.
    If you can not find any plastic babies you can use a bean and stick it in the bottom of the cake when it is done baking. Then add the icing and sugar! I hope you too can enjoy this great tradition with your family and friends! I know my kids enjoyed this today and I enjoyed their excitement when finding the little baby. Even Dora the Explorer celebrated 3 kings day with a king cake today!

    KING CAKE DOUGH:
    1/2 c warm water (110 degrees f.)
    2 pkg active dry yeast
    1/2 c sugar (plus 2 tsp)
    4 1/2 c all purpose flour, un-sifted
    1 tsp nutmeg, ground or fresh grated
    1 Tbsp cinnamon
    2 tsp salt
    1 tsp lemon zest or orange zest
    1/2 c warm milk (110 degrees f.)
    5 egg yolks
    1 stk butter, (plus 1 tbsp) softened
    1 1 each egg and 1 tbsp milk beaten (egg wash)
    TINTED SUGARS
    3/4 c sugar
    1/4 tsp purple food color
    1/4 tsp green food color
    1/4 tsp yellow food color
    ICING
    3 c powdered confectioners sugar
    1/4 c fresh lemon juice, strained
    3-6 Tbsp water

    1) In a small bowl add the warm water and sprinkle in the yeast with 2 teaspoons of sugar. Allow the yeast and sugar to rest for 5 minutes then mix well. Set the bowl in a warm place for 10 minutes, or until the yeast bubbles and mixture almost doubles in volume.
    2)Combine 3 1/2 cups flour with 1/2 cup sugar, nutmeg, cinnamon, and salt, then sift into a large mixing bowl. Stir in the lemon zest or orange zest. If you have a stand mixer with a dough hook then you can use it to mix all the dough ingredients.
    3)Create a “hole” in the middle of the bowl with the flour mixture on the sides of the bowl. Gently pour in the yeast mixture and the warm milk into the flour mixture. Add the egg yolks and combine the dry ingredients with the wet mixture. When the dough is smooth cut in the stick of butter 1 Tbsp at a time and continue to fold and combine until the dough can be formed into a soft ball shape.
    4)Place the ball of dough on a lightly floured surface and knead adding up to another cup of flour in small tablespoon portions at a time. Continue to knead the dough until smooth, shiny and elastic, about 10 minutes or so.

    5)Coat the inside of a large bowl evenly with 1 Tbsp softened butter. Place the dough ball in the bowl and rotate until the entire surface is buttered. Cover the bowl with a kitchen towel and place in a draft-free place for about 1 1/2 hours, or until the dough doubles in volume. Spray a large cookie sheet or round pizza pan with cooking spray and set aside.
    6)Remove the dough from the bowl and place on a lightly floured surface. Using your fist punch down the dough with a heavy blow. Roll the dough into a cylinder or tube shape. Twist the dough to form a curled cylinder and loop it onto the baking sheet pan. Pinch the ends of the dough together to complete the circle.
    7)Cover the dough with a kitchen towel and allow to rise again in a warm location for about 45 minutes or until the dough circle doubles in volume.
    8)Brush the top and sides of the dough with the egg wash and bake on the middle rack of the oven for 30-35 minutes, or until golden brown. Cool cake to room temperature on a wire rack. Now is the time to hide the bean or plastic baby. Insert the bean or plastic baby on the bottom of the cake so you can't tell from the top side where it is located.
    9)While the cake is cooling prepare the tinted sugars by taking three separate bowls with 1/4 cup of sugar in each. Then take the purple food color and slowly drop a dot or two at a time into the sugar. Using a spoon stir to mix and spread the color around until all sugar is tinted. Add more food color as needed. Repeat the process for the green and then the yellow in their own bowls as well. Set the tinted sugars aside.
    10)After your done mixing the sugars,combine the sugar, lemon juice and 3 tablespoons of water in a deep bowl whisking until smooth. If icing is too stiff whisk in 1 tablespoon water at a time until spreadable.
    11)Place cooled cake onto a serving platter or heavy cake cardboard and coat the top and sides of the cake with the icing. I like to dip my fingers into the icing and then drizzle it over the top of the cake. While the icing is still fresh immediately sprinkle the tinted sugars in individual rows about 2 to 3 inches wide of the purple, green and gold (yellow).
    12)Tips on Fillings: You do not have to add a filling but if you do sometimes the baking times vary. You don't want to end up with a doughy center. So you may have to bake it longer. If filling the cake you will want to have your filling prepared prior to the step where you are twisting the dough. In fact, for filled King Cake dough’s I will roll the dough out similar to cinnamon roll or danish dough style, instead of the cylinder shape as described above. Then I will sprinkle more cinnamon sugar and then add the filling. Then the dough will get rolled up around the filling jelly roll style. Then the filled dough is added to the baking sheet pan and looped into the circle and pinched before the second rising and baking stages. Typical fillings include sweetened and softened cream cheese, cherry pie filling, blueberry pie filling, lemon filling, custard filling, and my favorite is a double chocolate chocolate cake filling. Typically any pie or doughnut filling will work, you are only limited by your imagination.
    Here is an example of a cream cheese pie filling:
    Cream Cheese and Fruit Filling
    1 Can Cherry, apple or apricot pie filling (16-ounces)
    8 Ounces Cream cheese, softened
    1/2 Cup Sugar
    2 Tsp Flour
    2 Each Egg yolks
    1 Tsp Vanilla extract

    Directions:
    1. Using a floured roller on a floured surface, roll out the dough into a 30-by-9-inch rectangle as thin as pie crust. Let dough rest.
    2. If necessary, drain extra juice from pie filling. Mix the softened cream cheese with the sugar, flour, egg yolks and vanilla. Spoon an inch-wide strip of fruit filling the length of the dough, about 3 inches from the edge. Spoon the cream cheese mixture alongside the fruit, about 3 inches from the edge. Brush the exposed dough with egg wash.
    3. Fold or roll one edge of dough over the cream cheese and fruit in jelly roll fashion, and continue to roll the dough to the end, then brush with a little egg wash. Gently place one end of the filled rolled dough onto the greased baking sheet pan, and then ease the rest of the roll onto the pan, joining the ends to form the loop or circle. Add more egg wash to “glue” the ends together. Do not add the egg wash on the whole cake till step 7 is finished. Then pick up from step 7 in the dough directions above.

    Tuesday, December 7, 2010

    Candy Christmas Wreaths

    I know that this is the 3rd sweet recipe in a row that I have posted but I couldn't help myself but post this one today. My kids and I made a batch and had a lot of fun. Besides it's Christmas time we are supposed to gorge ourselves with sweets right? I am the youngest of 5 kids. So growing up this is what we would give our teachers at Christmas time. This is an inexpensive yummy treat and present. My kids love to make their own and eat them. I could not find the cinnamon red hots this year so I substituted them with red m&ms.

    Indgredients:
    1 10.5 oz bag of mini marshmallows
    1 c butter (2 sticks)
    2 tsp vanilla extract
    7 c corn flakes
    4 tsp green food coloring ( or till you get the shade you want)
    small red cinnamon candies or red m&ms

    Directions:
    1)In a large pot melt the butter, then add the marshmallows, melt those.
    2)Stir the butter and marshmallows together. Add the vanilla and food coloring till you get the shade of green you want.
    3)Pour in the cornflakes and mix well till it is covered pretty good.
    4)Grease your hands with butter. drop onto waxed paper and shape. If the kids are working with you make sure you let it cool just a little bit before they work with it. Just don't wait too long or it will harden. This batch makes two 9 in wreaths or several small ones.
    Jadas sweet wreath! You can tell she really likes the berries!

    Lovin' his wreath

    Delish!

    Monday, December 6, 2010

    Peppermint Marshmallow Popcorn


    Doesn't this stuff look GOOOOOOD?!? I tasted this oooeey goooey goodness for the first time courtesy of my best friend Brooke. I told her that I HAD to have the recipe. This stuff is seriously addicting! It's like Christmas in your mouth! It makes a big batch! Anytime I have family in town I make it so I don't eat the whole batch myself. It is the perfect Christmas treat! You can eat it all year long substitute the candy cane for  heath bits, Recesses pieces, m&m's etc.. Watch out now! I bet you can't eat just one bite!

    Ingredients: 
    1/2 c butter
    1/2 c margarine
    1/2 c corn syrup, light
    1 tsp vanilla
    1 16 oz bag of mini marshmallows ( if you can't find a 16 oz bag just use 1 1/2 bags of the 10.5 oz)
    2 gallons of air popped popcorn (or 3 bags of microwave popcorn,use very light butter)
    30   miniature candy canes, crushed
    1 1/3 c sugar

    Directions:

    melt butter and margarine in a pot. add the sugar, corn syrup, and vanilla. Boil for 5 minutes of med heat.
    layer the pop corn, candy canes and marshmallows in a large bowl or pot.
    Pour the sauce over and mix well with a large spoon. It can bet hard to stir this sticky goodness but it is worth it! You can add more popcorn till it is the consistency you want.
    When you are done mixing pour it onto wax paper and spread it out to cool. You can store it in gallon zip lock bags.


    Saturday, December 4, 2010

    Death By Oreo Cupcakes

    I have this new friend that I have made named Debbie Wright. She is a good ole southern girl like me. She is from Louisiana and even though she is an LSU fan I still call her my friend.  I met her through www.Justapinch.com. We were able to meet in person at the last contest ceremony in Nashville were my cumin pork chops were the main course and her death by Oreo Cupcakes  were the dessert. I have to tell ya these bad boys  were sooooo good. If you are an Oreo fan then these are for you! There is an Oreo cookie at the bottom of the cupcake liners and cookies in the cake and icing! Not only do they look cute they taste amazing too. You will feel like you have died and gone to Heaven! So here is her Death by Oreo recipe. Enjoy!

    INGREDIENTS:
    1 pkg oreos, regular size
    1 pkg mini oreos, for decoration
    1 pkg chocolate cake mix/ mix according to directions on box
    8 oz cream cheese, room temperature
    8 Tbsp butter, room temperature
    3 3/4 c powdered sugar
    1 tsp vanilla extract
    cupcake liners

    DIRECTIONS:
    Preheat oven to 350
    Mix cake according to directions
    Line cupcake tins with liner, place an regular size oreo cookie in the bottom of each one
    Take 1/2 of remaining cookies and chop coarsely and add to cake mix. Fill the cupcake tins
    Bake for 15 min..according to box. While cupcakes are baking make the frosting
    Cream togather butter and cream cheese..add vanilla
    add powdered slowly until blended well
    chop remaing regular sized oreos very fine. Add to frosting
    After cupcakes are cool put frosting on and decorate with a few mini oreos on top

    Wednesday, November 24, 2010

    2 Great recipes for the holidays!

    I know I'm from the south and I should eat "dressing" but this is what I ate growing up. My mom calls this Yankee stuffing. This is one of my grandmother's recipes. She got it from a 1950's cookbook. This was the one thing I got to help my mom with for Thanksgiving dinner when I was little. I would sit at the table and tear up the bread pieces watching the Macy's Thanksgiving Day parade. I usually double this recipe for a large crowd.

    Fluffy Stuffing

    1 c onion. chopped
    1 c butter or margarine ( i like to use margarine because it doesn't burn as easily as butter)
    6 c soft bread, cubed or just torn
    6 c rice krispies
    1 1/2 tsp poultry seasoning
    1/2 c chicken broth ( you can use canned broth or homemade broth from the turkey giblets)
    salt and pepper to taste


    1) tear up or cube the bread. You can use white, whole wheat or a mix. Pour the 6 cups into a large bowl add the 6 cups of Rice Krispies. Toss together.
    2) cook onion in butter or margarine until golden and onions are clear. Add poultry seasoning to this a stir.
    3) Pour over rice Krispies and bread cubes. . Mix well.
    4) Place the mixture in a baking dish. Drizzle the broth over the mixture.
    5) Bake at 350 degrees for 30 minutes ( cover if desired soft and uncover for crunchy)
    TIP: GIBLET BROTH: Boil the neck, liver, and other things stuffed in the turkey when bought. Simmer for about 1 hour. Use 1/2 cup of broth for the stuffing. Discard the rest. 
    This is my mom's recipe. I have been eating this awesome pie for years. It is easy to make and best served cold. I like to make it the night before and put it in the fridge to chill. I once had a boyfriend that loved this pie so much that he called it Buttermilk dream pie! LOL This recipe makes 2 pies but of course you can half it and make 1. Enjoy!
    Mama's Buttermilk Pie


    1 Cup butter, melted


    6 eggs, beaten
    2 Tbsp Cornstarch
    2 Cups sugar

    1 tsp. Salt
    1 Cup Buttermilk
    1 tsp Vanilla


    2 (9in) deep dish unbaked pie shells


    Preheat the oven to 350 degrees
    1)Add butter to eggs
    2)Add combined dry ingredients, buttermilk and vanilla.
    3)Pour into pie shells evenly.
    4)bake for 50mintues to 1 hour.
    TIP: If you have a pie shield place it on top of crust about 35min into cooking. If you don't you can cover the crust with foil to keep it from burning.


    Sunday, November 7, 2010

    5 Minute Cake in a Cup!

    I was inspired by the snow yesterday to post the super easy and delish recipe. It reminds me of cooking in an easy bake oven. It's the perfect dessert for a single serving!

    INGREDIENTS:

    4 Tbsp Flour
    4 Tbsp sugar
    2 Tbsp Cocoa
    1 Egg
    3 Tbsp Milk
    3 Tbsp Oil
    3 Tbsp Chocolate Chips
    1 Tbsp Caramel Bits ( you can substitute these with toffee bits, Andes mints etc...)
    1/8 tsp vanilla extract
    pinch of salt
    1 coffee mug (microwave safe)  sprayed with cooking spray

    DIRECTIONS:
      Spray the mug with cooking spray. In a separate bowl mix together the dry ingredients. Add egg and mix. Pour in milk and oil and mix. Add Chocolate chips, caramel bits, and Vanilla and mix. Pour mixed ingredients into the mug. Microwave 3 minutes at 1000 watts. (Ok if it rises over the top.) Let cool. Tip out onto plate or eat it straight from the mug. Dig in!

    Thursday, October 21, 2010

    Pumpkin Spice Truffles

    The are so festive and cute! Impress your friends with these super easy truffles. My kids really enjoyed eating the ones that didn't turn out so great and dipping the pretzels in the left over chocolate.  Happy Fall Y'all!

    1 box French Vanilla cake mix (or yellow or plain vanilla)
    1 cup canned pumpkin
    1/2 tsp cinnamon
    1/4 tsp ground ginger
    1/8 tsp allspice
    1/8 tsp freshly grated nutmeg
    3/4 cup water
    1/3 cup vegetable oil
    4 large eggs
    ~~~~~~~~~~~~~~
    1 can cream cheese frosting
    ~~~~~~~~~~~~~~
    chocolate candy melts or almond bark

    Beat everything together (ending with the eggs) according to the package instructions and bake in a 13 X 9" pan. Make sure the cake is completely baked (no gooey middle) before removing from the oven. Let cool completely on a wire rack.

    Crumble the cake apart in a bowl and add most of the can of cream cheese. Using your fingers, mix together until the cake holds together when formed into a ball. Add more frosting of necessary. Roll into balls of about a 2 bite size. Or you can use a cookie scoop for a more uniform size. Then roll them to make them more rounded. This should make about 65. Place on cookie sheets lined with wax paper and refrigerate several hours or overnight.

    When ready to dip, melt the candy melts (I used two bags of melts total) a 1/2 bag at a time following the directions on the package. If you are using the white almond bark, when it is all melted you can mix in the food coloring to make it orange. Stick the pretzel in the middle of the dough and then roll it in the chocolate from side to side till it is covered. Place on another sheet of wax paper. Refrigerate till ready to eat.


    * TIP:  If the chocolate seems too thick you can add about 1/2 TBL of oil to thin it out, mix it in well.


    Combine all ingredients (except icing & candy coating)  in a bowl, adding the eggs last!

    Sunday, September 19, 2010

    Easy Mango Sorbet

    This is my new favorite ice cream! This recipe is so smooth,creamy, and refreshing! It is also so easy to make. You don't even need an ice cream maker. All you need is a blender or food processor. This makes about 1 quart. I like to double it and make about half a gallon.

    2 fresh ripe mangos
    1 c white sugar
    3 Tbsp coconut milk
    1 tsp lemon juice
    1 8 oz container whipping cream (1 cup)

    Slice the mangos open and scoop out all of the fruit from the skins. Don't forget to include fruit around the seed (a knife works well for this).
    Place the fruit in a food processor or blender. Add the sugar and blitz for 1 minute, or until the sugar has dissolved and you are left with a delicious mango puree.
    Add the coconut milk and lemon juice, and briefly blitz to combine (a few seconds).
    Pour the mango puree into a bowl or container while you continue to use your processor/blender. Scape down the sides and bottom with a rubber spatula to remove as much of the puree as possible.
    Now pour the whipping cream into the processor/blender. Blitz until the cream forms stiff peaks, or is quite stiff (not runny) when dipped into with your finger.
    Add the mango puree to the whipped cream and blitz 5-10 seconds, or until you get a good mango-cream consistency.
    Pour into a large yogurt container or similar size tub and place in the freezer. Allow to freeze at least 6 hours, preferably 8.
    Serve the mango sorbet in bowls, or scoop into ice cream cones for the kids. (To make scooping easier, take the sorbet out of the freezer 10 to 15 minutes ahead of time).

    Friday, August 13, 2010

    Chocolate popcorn!

    NO, your eyes are not deceiving you this popcorn is green! We  love this popcorn. You can do it in any color you want. My Kids like the green that way it is "monster" popcorn. My kids love it so much I have to cut them off and eat the rest myself. LOL! I hope yall enjoy this easy tasty treat!

    3 Popped bags of microwave popcorn (I like butter flavor)
    1 1b of melting chocolate
    food coloring ( any color)
    salt to taste

    Pop the 3 bags of popcorn
    Next melt the chocolate in  the microwave, melting in 45 sec intervals mixing between melting
    After chocolate is done melting you can add any color of food coloring you like. Or you can just leave it white.
    Place half the popcorn in a very large bowl.
    Dump half of the chocolate into the popcorn bowl and mix well.
    Dump the remaining popcorn on top and pour the rest of the chocolate over the popcorn.
    While mixing the popcorn sprinkle salt on, so you get that sweet and salty flavor.
    Mix until popcorn is covered with chocolate.
    let the popcorn set before serving.
    * do not put the popcorn in the fridge, it will stick to the side of the bowl.